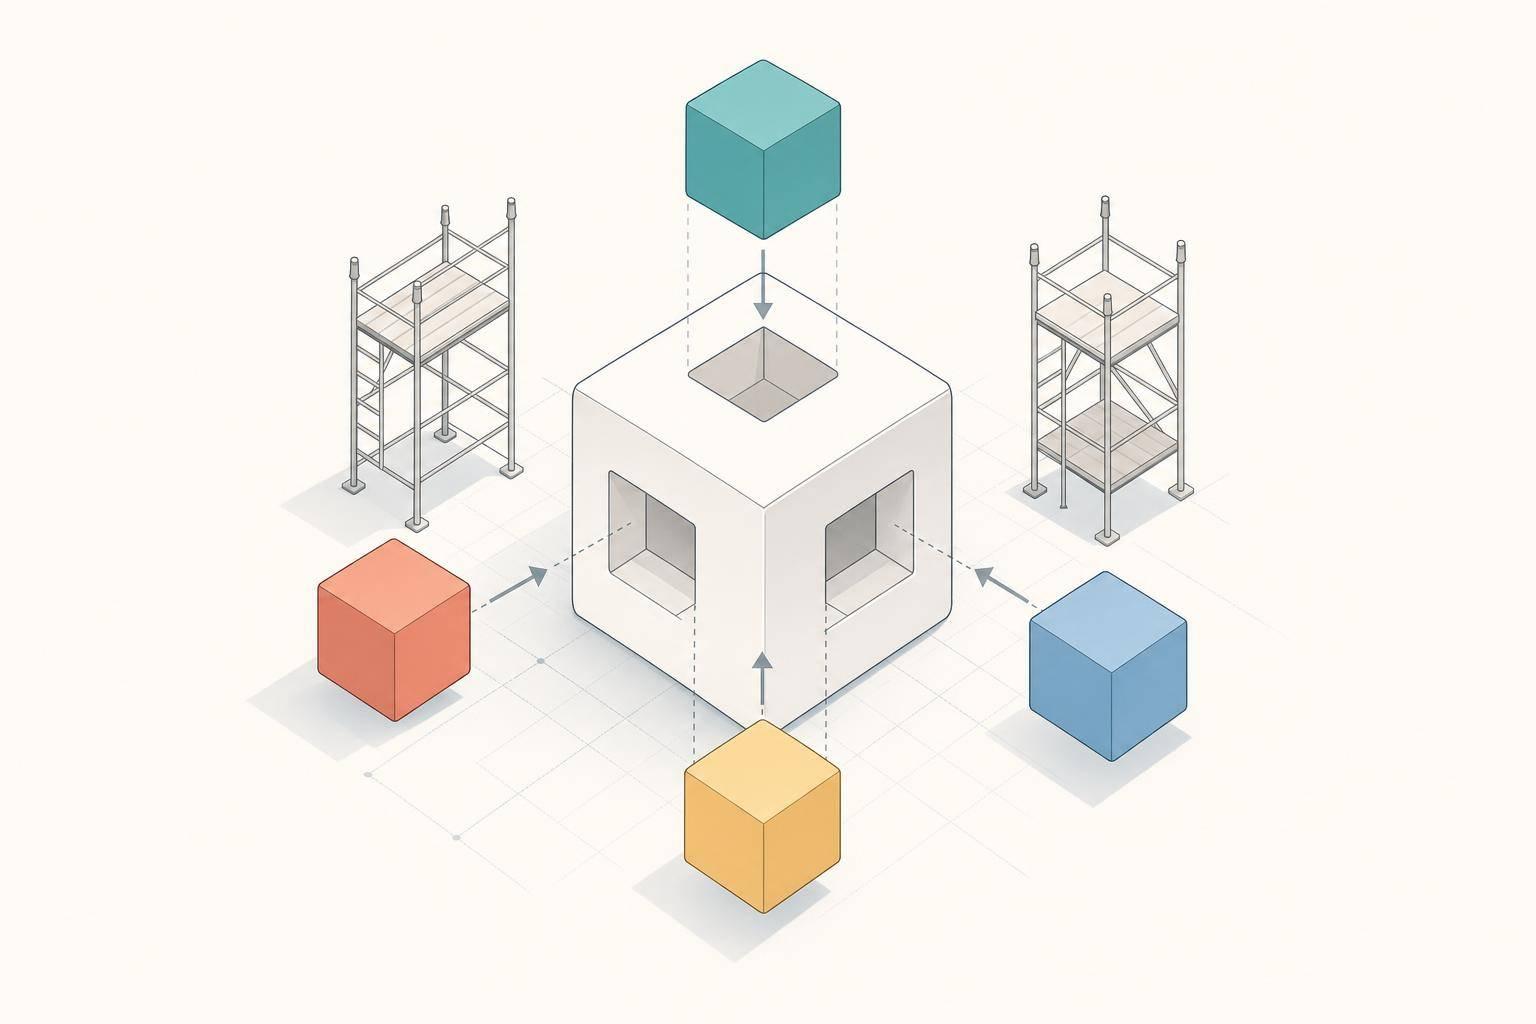
You can build your first Gutenberg block with 3 things: Node.js, a local WordPress site, and the @wordpress/create-block command.
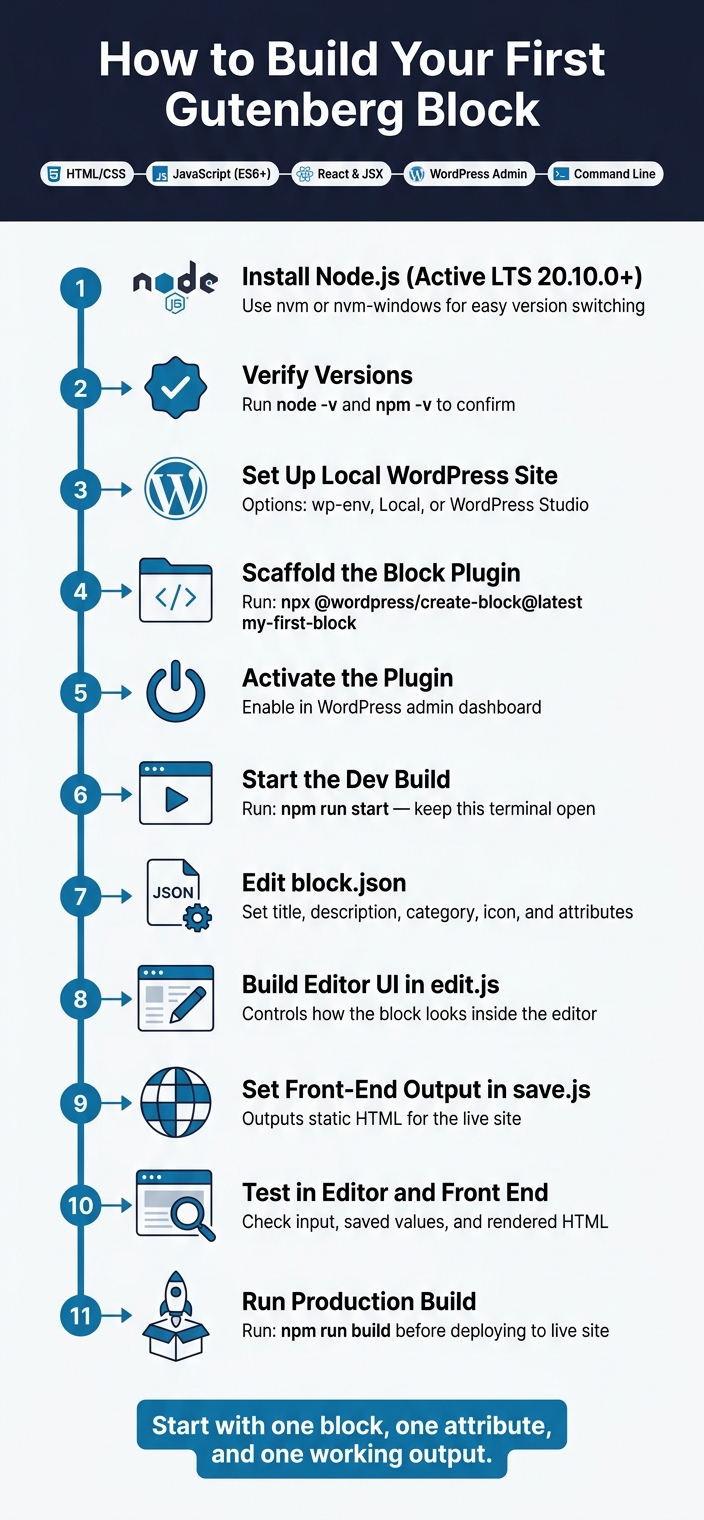
I’d keep the process simple: install Node.js 20.10.0+ and npm 10.2.3+, set up a local WordPress site, scaffold a plugin, run npm run start, then edit block.json, edit.js, and save.js. In this guide, the sample project is a Copyright Date Block that prints ©, the current year, and an optional start year.
Here’s the whole workflow at a glance:
- Install Node.js Active LTS
- Check versions with
node -vandnpm -v - Create a local WordPress site with wp-env, Local, or WordPress Studio
- Run
npx @wordpress/create-block@latest my-first-block - Activate the plugin in WordPress
- Keep
npm run startrunning while you edit files - Change block settings in
block.json - Build the editor UI in
src/edit.js - Set front-end output in
src/save.js - Test in both the editor and the live page view
- Run
npm run buildbefore using it on a live site
A few facts stand out. Gutenberg is the React-based WordPress editor, and custom blocks are reusable content units you can add to posts and pages. Also, WordPress can flag a block as invalid if the saved HTML no longer matches changes made in save.js, so testing after each edit matters.
If you already know basic HTML, CSS, JavaScript, React, and essential WordPress plugins, you have enough to get started. The main idea is simple: start with one block, one attribute, and one working output.
Gutenberg Block Development Workflow: Step-by-Step Setup Guide
Building Your First WordPress Gutenberg Block: Beginner’s Guide!
sbb-itb-77ae9a4
What you need before you start
Before you write block code, make sure your skills and tools are in place. Start with what you already know, then patch the gaps.
Skills checklist before you begin
You’ll want a solid handle on HTML and CSS, ES6+ JavaScript, basic React and JSX, the WordPress admin, and the command line. You can skip advanced React state libraries for now. Those basics are enough to build the Copyright Date Block in this guide.
Once you’ve got that down, set up the tools for local development.
Tools needed for a local development setup
A block setup comes down to three core pieces: a code editor, Node.js tools, and a local WordPress site. With those, you can scaffold, build, and test your first block on your own machine.
Visual Studio Code is a strong pick for WordPress and JavaScript work. For Node.js, the latest @wordpress/create-block tool requires Node.js 20.10.0 or above and npm 10.2.3 or above as of June 2026 [3].
| Tool | Recommended Option | Requirement Level |
|---|---|---|
| Code Editor | Visual Studio Code | Required |
| Runtime | Node.js (Active LTS) | Required |
| Package Manager | npm (bundled with Node.js) | Required |
| Local WordPress | wp-env, Local, or WordPress Studio |
Required |
| Version Manager | nvm or nvm-windows |
Strongly recommended |
Install Node.js through Node Version Manager (nvm on Mac/Linux, nvm-windows on Windows) instead of installing it directly [1] [4]. It makes switching Node versions between projects much easier and helps you avoid permission issues and version clashes. Run nvm install --lts to install the current LTS release.
If any of the basics feel rusty, spend a little time with a learning resource before you scaffold the block.
Using WP Winners as a learning reference
If you want a refresher on React, JSX, or plugin basics, WP Winners has practical WordPress tutorials and guides.
Set up a local Gutenberg development environment
Use the tools from the checklist to put your local setup together. Go in this order: Node.js, local WordPress, then the project folder. That sequence saves time and cuts down on setup issues later.
Install Node.js and verify npm is working
If you installed Node.js with nvm, run these commands in your terminal to make sure it’s all working:
node -v npm -v Both commands should print version numbers. Make sure your Node.js and npm versions match the block tool requirements. For block development, use Active LTS.
Node.js powers the Gutenberg build tools, including JSX compilation, ESNext transpilation, linting, formatting, and testing [1]. It also interacts heavily with the WordPress REST API to save and retrieve block data.
Once Node is working, move on to your local WordPress site.
Create a local WordPress site and open the editor
Use wp-env if you want the official Docker setup, or use Local if you prefer a GUI-based workflow.
wp-env sets up a Docker-based environment and maps your local plugin folder into WordPress, so code changes appear right away [5]. The default login is Username: admin and Password: password at http://localhost:8888/wp-admin/ [5].
After the site is running, open the dashboard, go to Posts or Pages, and click Add New to load the block editor.
With WordPress up and running, you’re ready to scaffold the block plugin inside the plugins folder.
Create your project folder and scaffold a block plugin
In your terminal, switch to the wp-content/plugins/ directory inside your local WordPress install. Then run the official scaffolding command:
npx @wordpress/create-block@latest my-first-block This creates a my-first-block folder with PHP registration, block.json, JavaScript source files, and a preconfigured wp-scripts build setup [2][3]. The @latest tag helps keep the scaffold aligned with current WordPress standards [2].
If you’d rather go step by step, run npx @wordpress/create-block@latest without a project name. That starts interactive mode and walks you through the block title, namespace, and description [3].
From there, open the generated plugin folder and start editing your first block files.
Understand the generated plugin and build your first block
After scaffolding, the next step is to get familiar with the files that were generated. Before you change anything, it helps to know which files do what. These files control how your Copyright Date Block looks in the editor and how it shows up on the front end.
Key files in the scaffolded block plugin
You’ll spend most of your time in a small set of files:
| File | Purpose | What It Controls |
|---|---|---|
block.json |
Metadata | The block’s name, title, icon, category, description, attributes, and scripts and styles to load |
src/index.js |
Registration | Registers the block and connects edit and save |
src/edit.js |
Editor UI | Controls the editor UI |
src/save.js |
Static Output | Outputs static front-end HTML |
block.json is the main reference point for the block. It defines what the block is and how WordPress should treat it. For day-to-day work, src/edit.js handles what users see inside the editor, and src/save.js handles the HTML saved for the front end.
Activate the plugin and run the development build
Activate the plugin in WordPress, then run npm run start in the plugin folder.
"When working on your block, use the
npm run startcommand. This will start a development server and automatically rebuild the block whenever any code change is detected." – WordPress Developer Resources [6]
Leave that terminal window open so the block rebuilds each time you save a file. Then check the editor and make sure the block loads as expected. If the build finishes without errors, open a post or page, click the "+" inserter button, and search for your block title. If you can find it there, you’re in good shape.
Make simple edits to metadata, attributes, and output
Start in block.json. Update the title, description, category, and icon fields so they match what the block does. After you save the file, refresh the WordPress editor tab. You should see the updated metadata in the inserter.
Next, move to src/edit.js. Replace the default text, add a TextControl for user input, and set up a matching attribute in block.json. In this case, that field can store an optional starting year. Each attribute needs a type, like string or boolean.
Then update src/save.js so the saved HTML includes that stored attribute on the front end.
One small gotcha: if you change save.js after the block has already been inserted, WordPress may mark the block as invalid. That happens because the saved HTML no longer matches the new save() output. If that shows up, click "Attempt Block Recovery". After that, save again and test the block both in the editor and on the front end.
Test your block and plan your next steps
Check editor behavior and front-end output
After you edit the block files, test the Copyright Date Block in two places: the editor and the front end.
Open a post or page in the WordPress editor and insert the Copyright Date Block. If your block uses a TextControl, type into the field and make sure the attribute changes right away. Then save the post and reload the editor to confirm the optional starting year loads back in as expected.
After that, check the front end. Make sure the output matches save.js, and confirm the copyright text shows the current year. If something looks off, open the browser console and look for JavaScript errors or block validation warnings.
| What to Verify | Expected Result |
|---|---|
| Editor input updates | Attribute changes immediately when you type |
| Saved value reloads | Stored value returns after saving and reloading |
| Front-end output matches | Rendered HTML matches save.js output |
Once those checks pass, you’re ready to move on.
Next skills to learn after your first block
When your first block is working, the next skills worth learning are dynamic rendering, sidebar controls, and nested blocks.
Start with dynamic blocks using render.php. That gives you output that can change on each page load. Then learn InspectorControls from @wordpress/block-editor so you can add a settings sidebar. It also helps to spend time with @wordpress/components, especially PanelBody, ToggleControl, and SelectControl, because those give users more control over how a block works.
After that, look into InnerBlocks so you can place blocks inside other blocks. You should also study how to register more than one block in a single plugin by giving each block its own subdirectory and its own block.json.
For all of this, the official Block Editor Handbook is the reference you’ll want to keep close.
Conclusion: The basic Gutenberg block workflow to remember
The workflow is pretty simple: install Node.js and npm, set up a local WordPress site, scaffold a plugin with @wordpress/create-block, activate it, edit the block files, keep npm run start running while you work, and test both the editor and the front-end output.
When the block is ready for a live site, run npm run build to minify and optimize the files.
Start with one block, one attribute, and one working output.
FAQs
Do I need to know React before building a Gutenberg block?
No. You can start building basic Gutenberg blocks without knowing React first.
That said, once you move into advanced or dynamic blocks, React and JSX start to matter a lot more. Gutenberg’s block system is built on React components, so that knowledge helps you work with the editor in a deeper way.
What causes a Gutenberg block to become invalid?
A Gutenberg block usually turns invalid when the content stored in the database no longer matches the markup produced by the save() function.
That mismatch often shows up after dynamic content changes or when block attributes are updated in a way that triggers validation errors.
When should I use npm run build instead of npm run start?
Use npm run start while you’re building and testing. It watches your files and rebuilds the block each time you save, which makes day-to-day work a lot smoother.
When it’s time to ship, switch to npm run build. That command creates an optimized, minified version of your block that’s ready to publish or deploy to a live site.
Related Blog Posts
- WordPress Website Development Tutorial: A Beginner’s Guide
- How to Format WordPress Posts with Gutenberg
- How to Publish Gutenberg Blocks to Block Directory
- How to Use Gutenberg Blocks for Post Layouts